Custom Roman shades cost a small fortune, and your rental came with sad vinyl mini blinds. This blinds to roman shades DIY turns a cheap mini blind into a folding fabric shade in about an hour by keeping a few slats and gluing or stitching fabric to them. Below are the exact steps, the fabric math, and fixes for the problems most tutorials skip.
How the Blinds to Roman Shades DIY Hack Works
A mini blind already has everything a Roman shade needs: a headrail, lift cords, a bottom rail, and brackets. You strip off most slats, keep a handful as stiffeners, and attach fabric. When you pull the cord, the slats stack and the fabric folds into neat pleats.
Here’s the catch: this works with corded mini blinds. Most new stock blinds in the U.S. have been cordless since a 2018 safety standard, and their spring mechanisms don’t convert well. That changes what you buy.
Materials and Cost
| Item | Notes | Rough cost |
|---|---|---|
| Vinyl mini blind (corded, sized to window) | Or reuse the one you have | $4–$15 |
| Fabric | Medium weight cotton or canvas holds folds best | $5–$25 |
| Blackout lining (optional) | Makes the room much darker | $5–$15 |
| Permanent fabric glue or hot glue | Or needle and embroidery floss | $5–$8 |
| Scissors, measuring tape, flathead screwdriver | Screwdriver pops off stoppers | Have them |
Key takeaway: most people finish this blinds to roman shades DIY for under $30 per window.
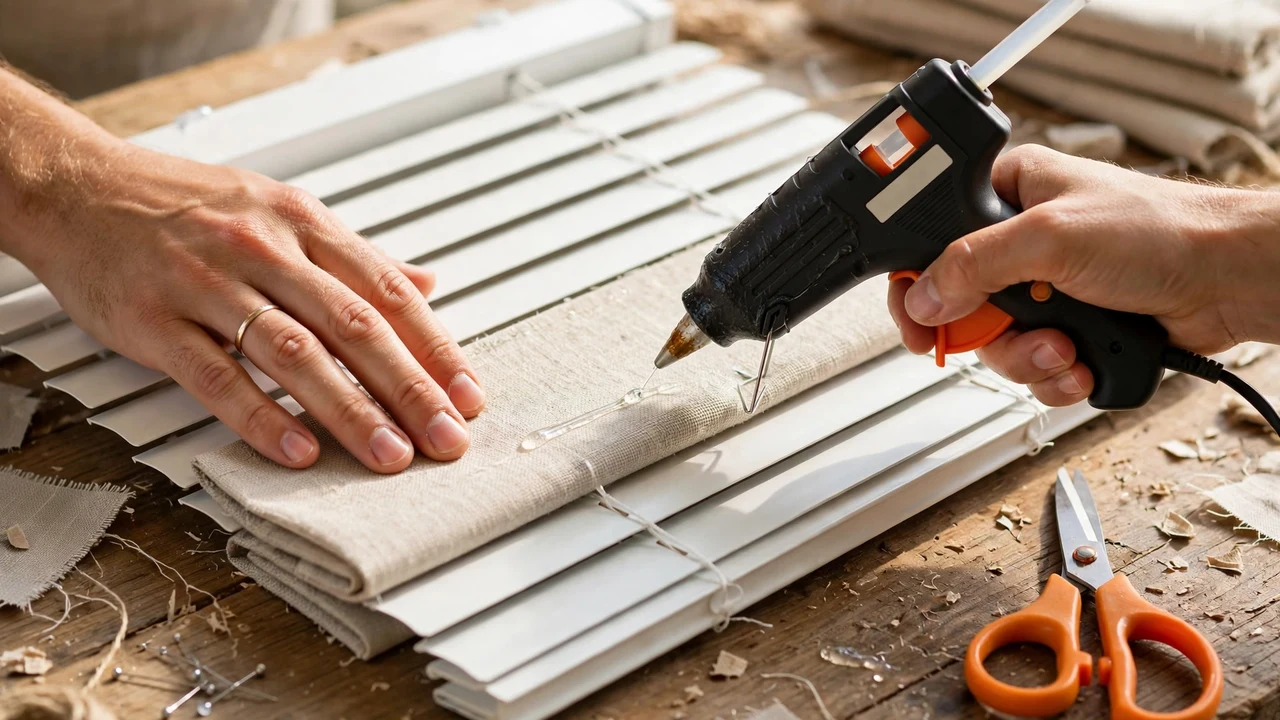
Step-by-Step: Blinds to Roman Shades DIY
- Measure the window and cut fabric. Add 1 inch to width and length for hemming. For a 28 x 72-inch blind, cut 29 x 73 inches.
- Hem the edges. Iron and glue (or sew) a narrow hem. Add blackout lining now if using it.
- Lower the blind fully and lay it flat face down.
- Cut only the ladder strings (the thin tapes between slats). Do NOT cut the thick lift cords running through the slat holes.
- Pop off the bottom stoppers with a flathead screwdriver, untie the knots, and slide off all slats.
- Decide spacing. Tutorials use 7 to 10 inches. Closer spacing means more, smaller folds; farther spacing gives fewer, larger, flatter folds.
- Restring the slats you’re keeping back onto the lift cords at your chosen spacing, then reattach the bottom rail and stoppers.
- Attach fabric to each slat. Glue along the slat, keeping the cord holes clear so cords slide freely. Or stitch each slat through its cord hole with floss.
- Wrap the headrail and bottom rail. Glue the top inch of fabric to the front of the headrail; cut a small slit for the cord.
- Hang it in the original brackets and test the lift several times.
Picture this: you’ve glued every slat, you hang it, and the cord won’t budge because glue sealed a hole. Big mistake. Poke a toothpick through each hole before glue dries.
Glue vs Stitching: Which Holds Better?
Now, you might be wondering which method lasts. Reality Daydream’s tutorial found glue alone didn’t hold well and switched to stitches. Commenters had mixed results.
| Method | Pros | Cons |
|---|---|---|
| Hot glue | Fast, cheap | Can let go in hot, sunny windows |
| Permanent fabric glue | Flexible, stronger bond | Needs drying time |
| Stitching with floss | Most durable | Slower; needs a bulky needle |
| Glue + a few stitches | Best of both | Extra step |
The truth is, south- and west-facing windows get hot enough to soften hot glue. Use fabric glue or stitches there.
Fix the Common Problems
That brings us to the problems most blinds to roman shades DIY tutorials don’t warn about:
- Floppy, ruffled sides: use stiffer fabric, or iron-on interfacing.
- Knots untying: dab clear nail polish on each knot.
- Clanking bottom rail: stick small felt or Velcro dots on it.
- Can’t wash it: attach fabric to the headrail with thin Velcro so it’s removable for spot cleaning.
- Stack height: the folded shade can take up around 10 inches at the top when open. Mount higher if you want full window view.
- Brittle plastic brackets: old sun-baked brackets crack. Replace them for a few dollars.
Child and Pet Safety: Don’t Skip This
Corded window coverings are a known strangulation hazard for young children, which is why the CPSC urges families to go cordless. If you have kids or visiting kids:
- Keep cords short and out of reach with a cord cleat mounted high.
- Never place cribs, beds, or furniture near the window cord.
- Consider a cordless Roman shade instead of this hack.
Who Should Skip This DIY: homes with toddlers, unless you can fully secure the cords.
Is This Hack Renter-Friendly?
Yes, if you use the blinds already installed and keep them. Store the original slats in a bag so you can rebuild the landlord’s blind at move-out, or buy a matching $5 replacement.
No new holes needed. For other hole-free window options, see our no drill blinds guide and roller blinds vs roller shades.
DIY vs Buying a Roman Shade
| DIY from blinds | Stock Roman shade | Custom | |
|---|---|---|---|
| Cost | About $15–$30 | About $30–$100 | Much more |
| Fabric choice | Unlimited | Limited | Wide |
| Durability | Fair | Good | Best |
| Cordless option | No | Usually yes | Yes |
On the flip side, if you value safety or longevity over fabric choice, a stock cordless shade is worth the extra money.
Frequently Asked Questions (FAQs)
Can you turn cordless blinds into Roman shades?
It’s much harder. Cordless blinds use a spring system that doesn’t adapt well. Corded mini blinds work best.
How many slats do you keep?
Enough to space them 7 to 10 inches apart. A 72-inch shade usually needs about 7 to 10 slats.
What fabric is best for DIY Roman shades?
Medium-weight cotton, linen blends, or canvas. Very thin fabric droops; very thick fabric won’t fold neatly.
Is this a no-sew project?
It can be, using fabric glue. Stitching a few points adds durability.
Bottom Line
This blinds to roman shades DIY gives you a custom-fabric look for the price of lunch. Keep the lift cords, space slats 7 to 10 inches, use fabric glue or stitches, and secure cords if kids are around. For more cheap weekend projects, try our cheap home upgrades or pair it with a curtain or drape for layered style.